NEO Plus Installation Guide
How to Install Your NEO PLus Bidet
NOTE: For LUXE Customers upgrading from a NEO to a NEO Plus Series bidet, please use the new parts included with your kit. The hardware sizes between NEO and NEO Plus Series bidets are different.
COLD WATER SET-UP
NEO 120, 185, 320
HOT WATER SET-UP
NEO 320
Step 1: Prepare for Installation
To start or pause a clip, click on the video.
On-screen text: Turn off the toilet tank water supply valve. Graphic showing the water supply valve handle being turned to Off.
On-screen text: Flush the toilet to empty the toilet tank.
Model using hand to flush the toilet.
Turn off the toilet’s water supply valve located either on the ground or on the wall. Flush the toilet to completely empty the tank.
NOTE: For LUXE Customers upgrading from a NEO to a NEO Plus Series bidet, please use the new parts included with your kit. Our installation parts are now standard to US fitting sizes.
On-screen text: Unscrew the toilet seat bolts to partially loosen the toilet seat. LUXE Bidet NEO Plus Series are installed without the complete removal of the toilet seat, unlike other bidets on the market.
Model using hand to unscrew the bolt on the underside of the toilet bowl.
Partially remove the toilet seat by lifting the hinge tabs and unscrewing the toilet seat bolts. There is no need to fully remove the toilet seat.
TIP: Hold onto the nuts underneath the toilet while unscrewing the toilet seat bolts from the top.
Step 2: Attach Your NEO Plus Bidet
To start or pause a clip, click on the video.
On-screen text: Lift the toilet seat up. LUXE Bidet NEO Plus Series are installed without thecomplete removal of the toilet seat, unlike other bidets on the market.
Model shown lifting the perpendicular toilet seat and lid up an inch from the toilet bowl.
On-screen text: Slide your NEO Plus bidet into the toilet seat bolts.
Model shown holding the bidet body with two hands and sliding the U-shaped adjustmentplates between the toilet seat and toilet bowl, into the toilet seat screws.
On-screen text: Tighten the bolts to secure the toilet seat.
Model shown tightening the toilet seat bolts underneath the toilet bowl.
Lift the toilet seat high enough to fit the bidet and place your NEO Plus bidet on the toilet. Position and slide the LUXE-Hinges into the bolts.
Secure the toilet seat back in by tightening the bolts.
On-screen text: Ensure that your NEO Plus bidet is correctly aligned with the toilet seat. In order to use the EZ-Lift function, make sure that the T-joint is not covered.
Model shown lifting the bidet body up with the toilet seat and lid lifted, to ensure the flipping feature is working properly after installation.
Ensure that your NEO Plus bidet is correctly aligned with the toilet seat. The T-Joint should not be covered in order for the bidet to use its EZ-Lift function.
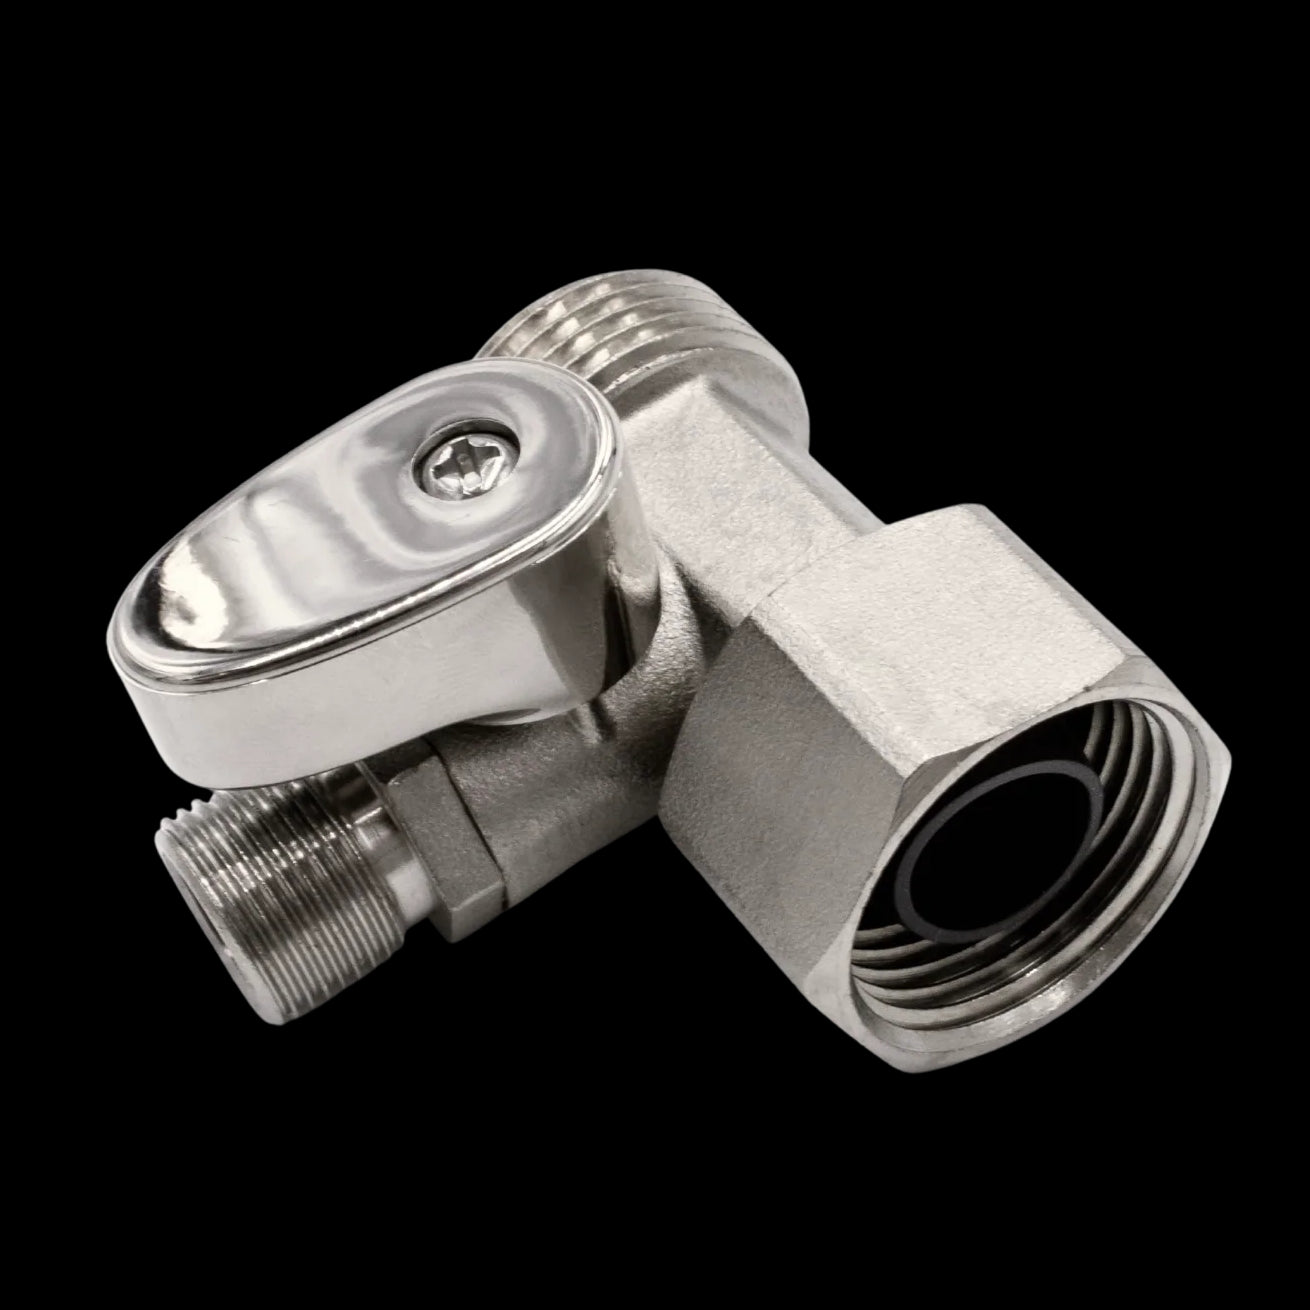
Step 3: Connect the Cold Water T-Adapter
To start or pause a clip, click on the video.
On-screen text: Unscrew the water supply hose from the toile tank.
Model shown unscrewing the toilet’s water supply hose from the toilet tank fill valve.
On-screen text: Connect the T-adapter to the tank.
Model shown screwing the female end of the T-adapter to the toilet tank fill valve.
Unscrew the water supply hose from the toilet tank’s fill valve and connect the top of the T-Adapter (7/8” end) to the toilet tank.
Ensure the rubber washer is inside the Cold Water T-Adapter and in its correct orientation.

NOTE: 7/8" is equivalent to a 15/16".
TIP: Place a towel or bucket underneath the toilet tank’s fill valve to catch any residual water.
Model shown holding up both ends of the cold water metal braided hose to show one end has amesh filter.
On-screen text: Connect the cold water hose with the mesh filter end to the T-Adapter.
Model shown tightening the end of the cold water hose with mesh filter to the side of the T-adapter, and then using the plastic wing nut to fasten the connection.
On-screen text: Connect the other end of the cold water bidet inlet.
Model shown tightening the other end of the cold water hose to the bidet inlet at the back of the bidet attachment, and then using the plastic wing nut to fasten the connection.
Connect the mesh filter end of the Cold Water Bidet Hose to the T-Adapter. Connect the other end of the hose to the cold water bidet inlet.

TIP: We recommend tightening by hand first, then using the wing nut on the bidet hose to tighten the connections at both ends.
Step 4: Connect the Water Supply
To start or pause a clip, click on the video.
On-screen text: Connect the water supply hose to the bottom of the cold water T-adapter.
Model shown tightening the toilet’s water supply hose to the bottom of the T-adapter.
Connect the water supply hose to the bottom of the T-Adapter (7/8” end).
NOTE: 7/8" is equivalent to a 15/16".
TIP: For NEO 320 users who only want a cold water connection, you can place a Hot Water Cap on the hot water inlet at this step.
On-screen text: Now turn on the water supply valve.
Video showing an arrow to the left to turn on the water supply valve.
Congrats! You made it! Turn on the water supply and you’re all set!
For Hot Water connection, proceed to Step 5.
Step 5: Prepare for Installation
To start or pause a clip, click on the video.
*Only for NEO 320 Plus.
On-screen text: Turn off hot water supply valve.
Video showing an arrow turning to the right to turn off the hot water supply valve.
On-screen text: Disconnect the hot water supply hose.
Video showing the hot water supply hose disconnecting from the hot water supply valve.
Turn off the hot water supply valve, located either underneath or near the sink.
Disconnect the sink’s hot water supply hose from the hot water supply valve.
TIP: Most valves will need to be turned clock-wise. Place a towel or bucket underneath the sink water supply valve to catch any residual water.
*Only for NEO 320 Plus.
On-screen text: Unscrew the side hex nut from the hot water T-adapter.
Model shown unscrewing the nut from the side of the hot water T-adapter.
On-screen text: Connect the T-adapter to the hot water supply valve.
Model shown tightening the female end of the hot water T-adapter to the hot water supplyvalve.
On-screen text: Thread the PU hose through the hex nut.
Model shown putting the plastic hot water hose through the hex nut of the T-adapter.
On-screen text: Connect the hose to the hot water T-adapter and screw the nut.
Model shown pushing the hot water hose all the way into the side nipple of the hot water T-adapter and then tightening the hex nut to secure the connection.
On-screen text: Now turn on the water supply valves.
Model shown using her hand to turn on the hot water supply valve.
Connect the female threaded 3/8” end of the Hot Water T-Adapter to the sink’s hot water valve.
Unscrew the side hex nut from the Hot Water T-Adapter, then thread the 8 mm end of the Hot Water Hose through the hex nut, keeping the hex nut in its original orientation.
With the Hot Water Hose threaded through the hex nut together, connect this end onto the 8 mm tip of the Hot Water T-Adapter.
Use the hex nut to tighten the connection.
NOTE: If you have an original NEO 320 and you are using a T-adapter under your sink to supply hot water, your existing T-adapter will be compatible with the NEO 320 Plus hot water hose.
TIP: Twist and push the Hot Water Hose onto the T-Adapter until you can no longer see the tip and it is flush against the threads. Ensure that the black rubber washer is inserted into the Hot Water T-Adapter.
Step 6: Prepare for Installation
To start or pause a clip, click on the video.
*Only for NEO 320 Plus.
On-screen text: Connect the hot water supply hose.
Model shown connecting the hot water supply hose to the top of the hot water T-adapter.
Connect the male threaded 3/8” end of the Hot Water T-Adapter to the sink’s hot water supply hose.
*Only for NEO 320 Plus.
On-screen text: Connect the other end to the hot water bidet inlet.
Model shown tightening the other end of the hot water hose to the bidet body.
On-screen text: Now turn on the water supply valves.
Model shown turning the hot water supply valve back on.
Connect the end of the Hot Water Hose that has a nut to the hot water inlet on the bidet.
Turn on the sink & toilet water supply valves, and you’re ready to go!
TIP: We recommend tightening by hand first, then using the wing nut on the bidet hose to tighten the connection.
Cold Water Set-up
NOTE: For LUXE Customers upgrading from a NEO to a NEO Plus Series bidet, please use the new parts included with your kit. Our installation parts are now standard to US fitting sizes.
On-screen text: Turn off the toilet tank water supply valve.
Graphic showing the water supply valve handle being turned to Off.
On-screen text: Flush the toilet to empty the toilet tank.
Model using hand to flush the toilet.
1. Turn off the toilet tank water supply at the wall. Flush the toilet to completely empty the tank.
On-screen text: Unscrew the toilet seat bolts to partially loosen the toilet seat LUXE Bidet NEO Plus Series are installed without the complete removal of the toilet seat, unlike other bidets on the market.
Model using hand to unscrew the bolt on the underside of the toilet bowl.
2. Partially remove the toilet seat by lifting the hinge tabs and unscrewing the toilet seat bolts. There is no need to fully remove the toilet seat.
TIP: Hold onto the nut underneath the toilet before unscrewing the toilet seat bolt from the top.
On-screen text: Lift the toilet seat up. LUXE Bidet NEO Plus Series are installed without thecomplete removal of the toilet seat, unlike other bidets on the market.
Model shown lifting the perpendicular toilet seat and lid up an inch from the toilet bowl.
On-screen text: Slide your NEO Plus bidet into the toilet seat bolts.
Model shown holding the bidet body with two hands and sliding the U-shaped adjustmentplates between the toilet seat and toilet bowl, into the toilet seat screws.
On-screen text: Tighten the bolts to secure the toilet seat.
Model shown tightening the toilet seat bolts underneath the toilet bowl.
3. Lift the toilet seat high enough to fit the bidet and place your NEO Plus bidet on the toilet. Position and slide the LUXE-Hinges into the bolts.
Secure the toilet seat back in by tightening the bolts.
On-screen text: Ensure that your NEO Plus bidet is correctly aligned with the toilet seat. In order to use the EZ-Lift function, make sure that the T-joint is not covered.
Model shown lifting the bidet body up with the toilet seat and lid lifted, to ensure the flipping feature is working properly after installation.
4. Ensure that your NEO Plus bidet is correctly aligned with the toilet seat. The T-Joint should not be covered in order for the bidet to use its EZ-Lift function.
On-screen text: Unscrew the water supply hose from the toile tank. Model shown unscrewing the toilet’s water supply hose from the toilet tank fill valve.
On-screen text: Connect the T-adapter to the tank.Model shown screwing the female end of the T-adapter to the toilet tank fill valve.
5. Unscrew the water supply hose from the toilet tank’s fill valve and connect the top of the T-Adapter (7/8” end) to the toilet tank.
NOTE: NOTE: 7/8" is equivalent to a 15/16".
TIP: Place a towel or bucket underneath the toilet tank’s fill valve to catch any residual water.
Model shown holding up both ends of the cold water metal braided hose to show one end has amesh filter.
On-screen text: Connect the cold water hose with the mesh filter end to the T-Adapter.
Model shown tightening the end of the cold water hose with mesh filter to the side of the T-adapter, and then using the plastic wing nut to fasten the connection.
On-screen text: Connect the other end of the cold water bidet inlet.
Model shown tightening the other end of the cold water hose to the bidet inlet at the back of the bidet attachment, and then using the plastic wing nut to fasten the connection.
6. Connect the mesh filter end of the Cold Water Bidet Hose to the T-Adapter. Connect the other end of the hose to the cold water bidet inlet.
TIP: We recommend tightening by hand first, then using the wing nut on the bidet hose to tighten the connections at both ends.
On-screen text: Connect the water supply hose to the bottom of the cold water T-adapter.
Model shown tightening the toilet’s water supply hose to the bottom of the T-adapter.
7. Connect the water supply hose to the bottom of the T-Adapter (7/8” end).
NOTE: 7/8" is equivalent to a 15/16".
TIP: For NEO 320 users who only want a cold water connection, you can place a Hot Water Cap on the hot water inlet at this step.
On-screen text: Now turn on the water supply valve.
Video showing an arrow to the left to turn on the water supply valve.
8. Congrats! You made it! Turn on the water supply and you’re all set!
For Hot Water connection, proceed to Step 9.
Hot Water Set-up
*Only for NEO 320 Plus.
On-screen text: Turn off hot water supply valve.
Video showing an arrow turning to the right to turn off the hot water supply valve.
On-screen text: Disconnect the hot water supply hose.
Video showing the hot water supply hose disconnecting from the hot water supply valve.
9. Turn off the hot water supply valve, located either underneath or near the sink.
Disconnect the sink’s hot water supply hose from the hot water supply valve.
TIP: Most valves will need to be turned clock-wise. Place a towel or bucket underneath the sink water supply valve to catch any residual water.
*Only for NEO 320 Plus.
On-screen text: Unscrew the side hex nut from the hot water T-adapter.
Model shown unscrewing the nut from the side of the hot water T-adapter.
On-screen text: Connect the T-adapter to the hot water supply valve.
Model shown tightening the female end of the hot water T-adapter to the hot water supplyvalve.
On-screen text: Thread the PU hose through the hex nut.
Model shown putting the plastic hot water hose through the hex nut of the T-adapter.
On-screen text: Connect the hose to the hot water T-adapter and screw the nut.
Model shown pushing the hot water hose all the way into the side nipple of the hot water T-adapter and then tightening the hex nut to secure the connection.
On-screen text: Now turn on the water supply valves.
Model shown using her hand to turn on the hot water supply valve.
NOTE: If you have an original NEO 320 and you are using a T-adapter under your sink to supply hot water, your existing T-adapter will be compatible with the NEO 320 Plus hot water hose.
10. Connect the male threaded 3/8” end of the Hot Water T-Adapter to the sink’s hot water valve.
Unscrew the side hex nut from the Hot Water T-Adapter, then thread the 8 mm end of the Hot Water Hose through the hex nut, keeping the hex nut in its original orientation.
With the Hot Water Hose threaded through the hex nut together, connect this end onto the 8 mm tip of the Hot Water T-Adapter.
Use the hex nut to tighten the connection.
TIP: Twist and push the Hot Water Hose onto the T-Adapter until you can no longer see the tip and it is flush against the threads.
*Only for NEO 320 Plus.
On-screen text: Connect the hot water supply hose.
Model shown connecting the hot water supply hose to the top of the hot water T-adapter.
11. Connect the female threaded 3/8” end of the Hot Water T-Adapter to the sink’s hot water supply hose.
TIP: Ensure that the black rubber washer is inserted into the Hot Water T-Adapter.
*Only for NEO 320 Plus.
On-screen text: Connect the other end to the hot water bidet inlet.
Model shown tightening the other end of the hot water hose to the bidet body.
On-screen text: Now turn on the water supply valves.
Model shown turning the hot water supply valve back on.
12. Connect the end of the Hot Water Hose that has a nut to the hot water inlet on the bidet.
Turn on the sink & toilet water supply valves, and you’re ready to go!
TIP: We recommend tightening by hand first, then using the wing nut on the bidet hose to tighten the connection.
View Full Installation Videos Here
COLD WATER SET-UP
NEO 120, 185, 320
HOT WATER SET-UP
NEO 320
Step 1: Prepare for Installation
To start or pause a clip, click on the video.
On-screen text: Turn off the toilet tank water supply valve.
Graphic showing the water supply valve handle being turned to Off.
On-screen text: Flush the toilet to empty the toilet tank.
Model using hand to flush the toilet.
Turn off the toilet’s water supply valve located either on the ground or on the wall. Flush the toilet to completely empty the tank.
NOTE: For LUXE Customers upgrading from a NEO to a NEO Plus Series bidet, please use the new parts included with your kit. Our installation parts are now standard to US fitting sizes.
On-screen text: Remove the pre-installed Standard Hinge Covers.
Model holding the bidet body down with one hand and using the other hand to take off the top of the bidet’s adjustment plates.
Image showing the inside of the Standard Hinge Covers are Ridged and the inside of the Alternative Hinge Covers are Hollow.
On-screen text: Snap on the Alternative Hinge Covers.
Model taking the Alternative Hinge Covers provided in the bidet box, and snapping it on the bidet’s adjustment plates.
Replace the Default Hinge Covers with the Alternative Hinge Covers. The Default Hinge Covers are ridged. The Alternative Hinge Covers are hollow.
Step 2: Attach Your NEO Plus Bidet
To start or pause a clip, click on the video.
On-screen text: Remove your LUXE toilet seat.
Model shown using both hands to lift the perpendicular toilet seat and lid off the seat hinges on the toilet bowl.
On-screen text: Remove the decorative covers.
Model shown removing the covers from the toilet seat hinges on the toilet bowl.
On-screen text: Hold onto the nuts underneath and unscrew the toilet seat bolts.
Model using one hand to hold the toilet seat bolts located on the underside of the toilet bowl.
Model using a screwdriver to loosen the toilet seat screw from the toilet bowl.
Remove the LUXE Toilet Seat through the quick-release method. Then remove the decorative covers and unscrew the toilet seat bolts. Only loosen the bolts enough to lift the bearings high enough to fit the hinges from the bidet.
TIP: Hold onto the nuts underneath the toilet while unscrewing the toilet seat bolts from the top.
On-screen text: Lift the bearing and slide the adjustment plate around the bearing.
Model showing lifting the toilet seat bearings from the top of the toilet bowl and sliding the U-shaped adjustment plates around the bearings.
On-screen text: Tighten the toilet seat bolts.
Video showing screwdriver tightening the toilet seat bolts from the top of the toilet bowl.
On-screen text: Reattach your LUXE toilet seat.
Video showing the toilet seat and lid lowered onto the bearings at the toilet bowl.
Lift the bearing slightly and slide the LUXE-Hinge into the bearing.
Ensure that the bearing is completely inside the LUXE-Hinge and that the posts are up against the inner edges of the LUXE-Hinges.
Tighten the toilet seat bolts and secure the LUXE Toilet Seat back into place. Please note that the bottom of the seat will not sit completely flush on the adjustment plates.
Step 3: Connect the Cold Water T-Adapter
To start or pause a clip, click on the video.
On-screen text: Unscrew the water supply hose from the toile tank.
Model shown unscrewing the toilet’s water supply hose from the toilet tank fill valve.
On-screen text: Connect the T-adapter to the tank.
Model shown screwing the female end of the T-adapter to the toilet tank fill valve.
Unscrew the water supply hose from the toilet tank’s fill valve and connect the top of the T-Adapter (7/8” end) to the toilet tank.
Ensure the rubber washer is inside the Cold Water T-Adapter and in its correct orientation.
NOTE: 7/8" is equivalent to a 15/16".
TIP: Place a towel or bucket underneath the toilet tank’s fill valve to catch any residual water.
Model shown holding up both ends of the cold water metal braided hose to show one end has a mesh filter.
On-screen text: Connect the cold water hose with the mesh filter end to the T-Adapter.
Model shown tightening the end of the cold water hose with mesh filter to the side of the T-adapter, and then using the plastic wing nut to fasten the connection.
On-screen text: Connect the other end of the cold water bidet inlet.
Model shown tightening the other end of the cold water hose to the bidet inlet at the back of the bidet attachment, and then using the plastic wing nut to fasten the connection.
Connect the mesh filter end of the Cold Water Bidet Hose to the T-Adapter. Connect the other end of the hose to the cold water bidet inlet.
TIP: We recommend tightening by hand first, then using the wing nut on the bidet hose to tighten the connections at both ends.
Step 4: Connect the Water Supply
To start or pause a clip, click on the video.
On-screen text: Connect the water supply hose to the bottom of the cold water T-adapter.
Model shown tightening the toilet’s water supply hose to the bottom of the T-adapter.
Connect the water supply hose to the bottom of the T-Adapter (7/8” end).
NOTE: 7/8" is equivalent to a 15/16".
TIP: For NEO 320 users who only want a cold water connection, you can place a Hot Water Cap on the hot water inlet at this step.
On-screen text: Now turn on the water supply valve.
Video showing an arrow to the left to turn on the water supply valve.
Congrats! You made it! Turn on the water supply and you’re all set!
For Hot Water connection, proceed to Step 5.
Step 5: Prepare for Installation
To start or pause a clip, click on the video.
*Only for NEO 320 Plus.
On-screen text: Turn off hot water supply valve.
Video showing an arrow turning to the right to turn off the hot water supply valve.
On-screen text: Disconnect the hot water supply hose.
Video showing the hot water supply hose disconnecting from the hot water supply valve.
Turn off the hot water supply valve, located either underneath or near the sink.
Disconnect the sink’s hot water supply hose from the hot water supply valve.
TIP: Most valves will need to be turned clock-wise. Place a towel or bucket underneath the sink water supply valve to catch any residual water.
*Only for NEO 320 Plus.
On-screen text: Unscrew the side hex nut from the hot water T-adapter.
Model shown unscrewing the nut from the side of the hot water T-adapter.
On-screen text: Connect the T-adapter to the hot water supply valve.
Model shown tightening the female end of the hot water T-adapter to the hot water supply valve.
On-screen text: Thread the PU hose through the hex nut.
Model shown putting the plastic hot water hose through the hex nut of the T-adapter.
On-screen text: Connect the hose to the hot water T-adapter and screw the nut.
Model shown pushing the hot water hose all the way into the side nipple of the hot water T-adapter and then tightening the hex nut to secure the connection.
On-screen text: Now turn on the water supply valves.
Model shown using her hand to turn on the hot water supply valve.
Connect the female threaded 3/8” end of the Hot Water T-Adapter to the sink’s hot water valve.
Unscrew the side hex nut from the Hot Water T-Adapter, then thread the 8 mm end of the Hot Water Hose through the hex nut, keeping the hex nut in its original orientation.
With the Hot Water Hose threaded through the hex nut together, connect this end onto the 8 mm tip of the Hot Water T-Adapter.
Use the hex nut to tighten the connection.
NOTE: If you have an original NEO 320 and you are using a T-adapter under your sink to supply hot water, your existing T-adapter will be compatible with the NEO 320 Plus hot water hose.
TIP: Twist and push the Hot Water Hose onto the T-Adapter until you can no longer see the tip and it is flush against the threads. Ensure that the black rubber washer is inserted into the Hot Water T-Adapter.
Step 6: Prepare for Installation
To start or pause a clip, click on the video.
*Only for NEO 320 Plus.
On-screen text: Connect the hot water supply hose.
Model shown connecting the hot water supply hose to the top of the hot water T-adapter.
Connect the male threaded 3/8” end of the Hot Water T-Adapter to the sink’s hot water supply hose.
*Only for NEO 320 Plus.
On-screen text: Connect the other end to the hot water bidet inlet.
Model shown tightening the other end of the hot water hose to the bidet body.
On-screen text: Now turn on the water supply valves.
Model shown turning the hot water supply valve back on.
Connect the end of the Hot Water Hose that has a nut to the hot water inlet on the bidet.
Turn on the sink & toilet water supply valves, and you’re ready to go!
TIP: We recommend tightening by hand first, then using the wing nut on the bidet hose to tighten the connection.
Cold Water Set-up
NOTE: For LUXE Customers upgrading from a NEO to a NEO Plus Series bidet, please use the new parts included with your kit. Our installation parts are now standard to US fitting sizes.
On-screen text: Turn off the toilet tank water supply valve.
Graphic showing the water supply valve handle being turned to Off.
On-screen text: Flush the toilet to empty the toilet tank.
Model using hand to flush the toilet.
1. Turn off the toilet tank water supply at the wall. Flush the toilet to completely empty the tank.
On-screen text: Remove the pre-installed Standard Hinge Covers.
Model holding the bidet body down with one hand and using the other hand to take off the topof the bidet’s adjustment plates.
Image showing the inside of the Standard Hinge Covers are Ridged and the inside of the Alternative Hinge Covers are Hollow.
On-screen text: Snap on the Alternative Hinge Covers.
Model taking the Alternative Hinge Covers provided in the bidet box, and snapping it on thebidet’s adjustment plates.
2. Replace the Default Hinge Covers with the Alternative Hinge Covers. The Default Hinge Covers are ridged. The Alternative Hinge Covers are hollow.
On-screen text: Remove your LUXE toilet seat.
Model shown using both hands to lift the perpendicular toilet seat and lid off the seat hinges onthe toilet bowl.
On-screen text: Remove the decorative covers.
Model shown removing the covers from the toilet seat hinges on the toilet bowl.
On-screen text: Hold onto the nuts underneath and unscrew the toilet seat bolts.
Model using one hand to hold the toilet seat bolts located on the underside of the toilet bowl.
Model using a screwdriver to loosen the toilet seat screw from the toilet bowl.
3. Remove the LUXE Toilet Seat through the quick-release method. Then remove the decorative covers and unscrew the toilet seat bolts. Only loosen the bolts enough to lift the bearings high enough to fit the hinges from the bidet.
TIP: Hold onto the nut underneath the toilet before unscrewing the toilet seat bolt from the top.
On-screen text: Lift the bearing and slide the adjustment plate around the bearing.
Model showing lifting the toilet seat bearings from the top of the toilet bowl and sliding the U-shaped adjustment plates around the bearings.
On-screen text: Tighten the toilet seat bolts.
Video showing screwdriver tightening the toilet seat bolts from the top of the toilet bowl.
On-screen text: Reattach your LUXE toilet seat.Video showing the toilet seat and lid lowered onto the bearings at the toilet bowl.
4. Lift the bearing slightly and slide the LUXE-Hinge into the bearing.
Ensure that the bearing is completely inside the LUXE-Hinge and that the posts are up against the inner edges of the LUXE-Hinges.
Tighten the toilet seat bolts and secure the LUXE Toilet Seat back into place. Please note that the bottom of the seat will not sit completely flush on the adjustment plates.
On-screen text: Unscrew the water supply hose from the toilet tank.
Model shown unscrewing the toilet’s water supply hose from the toilet tank fill valve.
On-screen text: Connect the T-adapter to the tank.
Model shown screwing the female end of the T-adapter to the toilet tank fill valve.
5. Unscrew the water supply hose from the toilet tank’s fill valve and connect the top of the T-Adapter (7/8” end) to the toilet tank.
NOTE: NOTE: 7/8" is equivalent to a 15/16".
TIP: Place a towel or bucket underneath the toilet tank’s fill valve to catch any residual water.
Model shown holding up both ends of the cold water metal braided hose to show one end has amesh filter.
On-screen text: Connect the cold water hose with the mesh filter end to the T-Adapter.
Model shown tightening the end of the cold water hose with mesh filter to the side of the T-adapter, and then using the plastic wing nut to fasten the connection.
On-screen text: Connect the other end of the cold water bidet inlet.
Model shown tightening the other end of the cold water hose to the bidet inlet at the back of the bidet attachment, and then using the plastic wing nut to fasten the connection.
6. Connect the mesh filter end of the Cold Water Bidet Hose to the T-Adapter. Connect the other end of the hose to the cold water bidet inlet.
TIP: We recommend tightening by hand first, then using the wing nut on the bidet hose to tighten the connections at both ends.
On-screen text: Connect the water supply hose to the bottom of the cold water T-adapter.
Model shown tightening the toilet’s water supply hose to the bottom of the T-adapter.
7. Connect the water supply hose to the bottom of the T-Adapter (7/8” end).
NOTE: 7/8" is equivalent to a 15/16".
TIP: For NEO 320 users who only want a cold water connection, you can place a Hot Water Cap on the hot water inlet at this step.
On-screen text: Now turn on the water supply valve.
Video showing an arrow to the left to turn on the water supply valve.
8. Congrats! You made it! Turn on the water supply and you’re all set!
For Hot Water connection, proceed to Step 9.
Hot Water Set-up
*Only for NEO 320 Plus.
On-screen text: Turn off hot water supply valve.Video showing an arrow turning to the right to turn off the hot water supply valve.
On-screen text: Disconnect the hot water supply hose.Video showing the hot water supply hose disconnecting from the hot water supply valve.
9. Turn off the hot water supply valve, located either underneath or near the sink.
Disconnect the sink’s hot water supply hose from the hot water supply valve.
TIP: Most valves will need to be turned clock-wise. Place a towel or bucket underneath the sink water supply valve to catch any residual water.
*Only for NEO 320 Plus.
On-screen text: Unscrew the side hex nut from the hot water T-adapter.
Model shown unscrewing the nut from the side of the hot water T-adapter.
On-screen text: Connect the T-adapter to the hot water supply valve.Model shown tightening the female end of the hot water T-adapter to the hot water supplyvalve.
On-screen text: Thread the PU hose through the hex nut.
Model shown putting the plastic hot water hose through the hex nut of the T-adapter.
On-screen text: Connect the hose to the hot water T-adapter and screw the nut.
Model shown pushing the hot water hose all the way into the side nipple of the hot water T-adapter and then tightening the hex nut to secure the connection.
On-screen text: Now turn on the water supply valves.
Model shown using her hand to turn on the hot water supply valve.
NOTE: If you have an original NEO 320 and you are using a T-adapter under your sink to supply hot water, your existing T-adapter will be compatible with the NEO 320 Plus hot water hose.
10. Connect the male threaded 3/8” end of the Hot Water T-Adapter to the sink’s hot water valve.
Unscrew the side hex nut from the Hot Water T-Adapter, then thread the 8 mm end of the Hot Water Hose through the hex nut, keeping the hex nut in its original orientation.
With the Hot Water Hose threaded through the hex nut together, connect this end onto the 8 mm tip of the Hot Water T-Adapter.
Use the hex nut to tighten the connection.
TIP: Twist and push the Hot Water Hose onto the T-Adapter until you can no longer see the tip and it is flush against the threads.
*Only for NEO 320 Plus.
On-screen text: Connect the hot water supply hose.
Model shown connecting the hot water supply hose to the top of the hot water T-adapter.
11. Connect the female threaded 3/8” end of the Hot Water T-Adapter to the sink’s hot water supply hose.
TIP: Ensure that the black rubber washer is inserted into the Hot Water T-Adapter.
*Only for NEO 320 Plus.
On-screen text: Connect the other end to the hot water bidet inlet.
Model shown tightening the other end of the hot water hose to the bidet body.
On-screen text: Now turn on the water supply valves.
Model shown turning the hot water supply valve back on.
12. Connect the end of the Hot Water Hose that has a nut to the hot water inlet on the bidet.
Turn on the sink & toilet water supply valves, and you’re ready to go!
TIP: We recommend tightening by hand first, then using the wing nut on the bidet hose to tighten the connection.
View Full Installation Videos Here
Alternative Solutions
Depending on your setup, you may require alternative parts. Please contact us if you need assistance.
Toilet Seat Bolt Sets
For when you need longer toilet seat bolts to complete bidet installation

Our bidets fit with most standard U.S. toilets. Depending on the toilet seat, your toilet screws may not be long enough to accomodate the installation of a bidet.
Our Toilet Seat Bolt Sets provide a longer length of 80 mm or 100 mm, to help complete bidet installation with ease.
Alternative Installation Kits
For completing bidet installation if the included parts do not fit your set up

If there is not enough room to install the T-Adapter or you cannot access the toilet fill valve (it may be hidden, blocked off, or has a hard supply line that cannot be removed), you may need an alternative installation method.
Flexible Water Supply Hose
For replacing a rigid water supply line, allowing you to complete bidet installation

Have a rigid water line? Prepare for your bidet installation with a Flexible Water Supply Hose. A Flexible Water Supply Hose allows you to install the T-Adapter included with your kit.
Our Flexible Water Supply Hose is perfect for set-ups that have a rigid or hard water line in place, or if you'd like to refresh your old water line.
Toilet Seat Bumpers
For a gap between the toilet seat & bowl due to the concave shape of an existing toilet seat

Depending on the shape and make of your toilet seat, gaps may occur.
For gaps under 1”, LUXE Bumpers will close the gap and provide a sturdy support for your set-up.
Add-ons to Optimize Setup
Optional accessories to upgrade your setup
Shut-off T-Adapters & Hoses
Easily limit the flow of water to the bidet
The water pressure of your bidet depends on the pressure level of your home.
Our Shut-off T-Adapters allow you to control the water pressure to your bidet, effectively decreasing the strength of the water pressure level.
Bidet Water Filter
For prolonging the life of your bidet

An innovatively designed 4-in-1 elimination system that filters out impurities and increases the longevity of your LUXE Bidet.
Can't find your part?
Can't find your part?
Installation FAQ

NEO Plus Series bidets are designed to fit a wide range of toilet makes and styles, and will work with the majority of North American toilet seats. To ensure that your toilet is compatible, please click here to see our Toilet Compatibility Checker.
NEO Plus Series bidets work with many one-piece toilets. To determine if your toilet is compatible, please click here to see our NToilet Compatibility Checker.
Some toilet seats may come with quick-to-remove twist hinges that twist to snap on and off the toilet bowl. Our bidets can be installed with these toilet seats. The trick is to also remove the screws/bolts that attach the seat hinges to the bowl.
For a more detailed break-down of the alternative installation, please see the full FAQ question here.
Can't find your question?
GET HELP WITH
Product Registration
Extend the standard 18-month warranty by an additional 6 months when you register your LUXE product.

How to Use a LUXE Bidet
First time? No problem, we've got your rear covered. Read our First Experience & Bidet Care Guide.

Bidet Fit Guide
Our bidet kits fit most standard US toilet setups. To check the sizing for yours, see our interactive guide.
